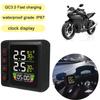
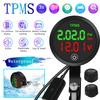
Features:
This TPMS is designed to provide you with more protection when riding. It will warn the tire condition in advance. After installing TPMS, this system can monitor the tire pressure and temperature in real time. If any abnormal tire pressure and temperature are
detected, the system will send a warning sound and a bright flashing icon to inform you in real time. Real-time reminders and problem solving can prevent traffic accidents and ensure the safety of riders and passengers.
With a QC 3.0 fast charging USB output, it can charge mobile phones, tablets and power banks. Support battery voltage detection and display, and low-voltage alarm function.
Specification:
Tire pressure setting range: 1~6.0Bar
Temperature setting range: 60℃~100℃
Working temperature: -20℃~+80℃
Storage temperature: -30℃~+85℃
Power voltage: DC 12V
Output voltage: DC 12V, 9V, 5V
Frequency: 433.92MHz±20.00MHz
Receiver:
Working temperature --20℃~80℃
Storage temperature: -30℃~85℃
Power-on voltage: DC 5V
Frequency: 433.92MHz±20.00MHz
Sensor:
Working temperature: -20℃~80℃
Storage temperature: -30℃~85℃
Pressure range: 0~6.6Bar
Pressure accuracy: +/-0.1Bar
Temperature accuracy: +/-3℃
Transmitting power: <10dB
Frequency: 433.92MHz±20.00MHz
Bracket installation instructions:
1. Unscrew the 2 screws, put on the motorcycle/electric bike and tighten;
2. Place the mounting head of the bracket toward the position you need, and confirm that the bracket is firm;
3. Install the tire pressure receiver on the bracket, tighten it and then lock it; use the ball head to rotate the tuning knob to move the joint part to adjust the appropriate angle appropriately
Power installation instructions:
1. When installing, the power cord needs to be connected behind the ignition switch, and the power can be automatically cut off after shutting down. The red connects to the 12V positive pole and the black connects to the ground.
2. Install the fixed bracket on the handlebar and lock it tightly. Install the host on the bracket and adjust the angle and lock it.
3. Install the sensor when the host is turned on. First install the tamper ring into the valve nozzle, then install the sensor on the valve according to the position and tighten it, then screw the tamper ring back and tighten it. If you find that there is no corresponding
position on the host If the pressure is displayed, reinstall the sensor at the corresponding position.
Sensor battery replacement instructions:
When replacing the battery of the sensor, please disassemble one by one, install the shell, do not mix or disassemble and install at the same time; it can effectively prevent the sensor from being misplaced and installed on other tires due to the wrong shell. (Button
CR1632, working temperature is -30℃~+80℃);
1. Before disassembling the sensor, please prepare a nut wrench, turn the nut clockwise to separate the nut and the sensor, and then remove the sensor counterclockwise;
2. Use a wrench to unscrew the upper cover of the sensor in a counterclockwise direction;
3. Take out the old battery from the battery clip and do a good job of environmental protection classification;4. Distinguish the positive and negative positions (positive "+" facing up); install a new button battery CR1632.
4. Distinguish the positive and negative positions (positive "+" facing up); install a new button battery CR1632.
5. Screw on the upper cover of the sensor, and then tighten it clockwise with a wrench
Package Included:
1 X Receiver
1 X Bracket
2 X Sensors
1 X Wrench
2 X Nut
1 X English manual
The merchant warrants that their products comply with all applicable laws, and are offered only if they comply with Joom’s policies and EU Product Safety and Compliance laws.


